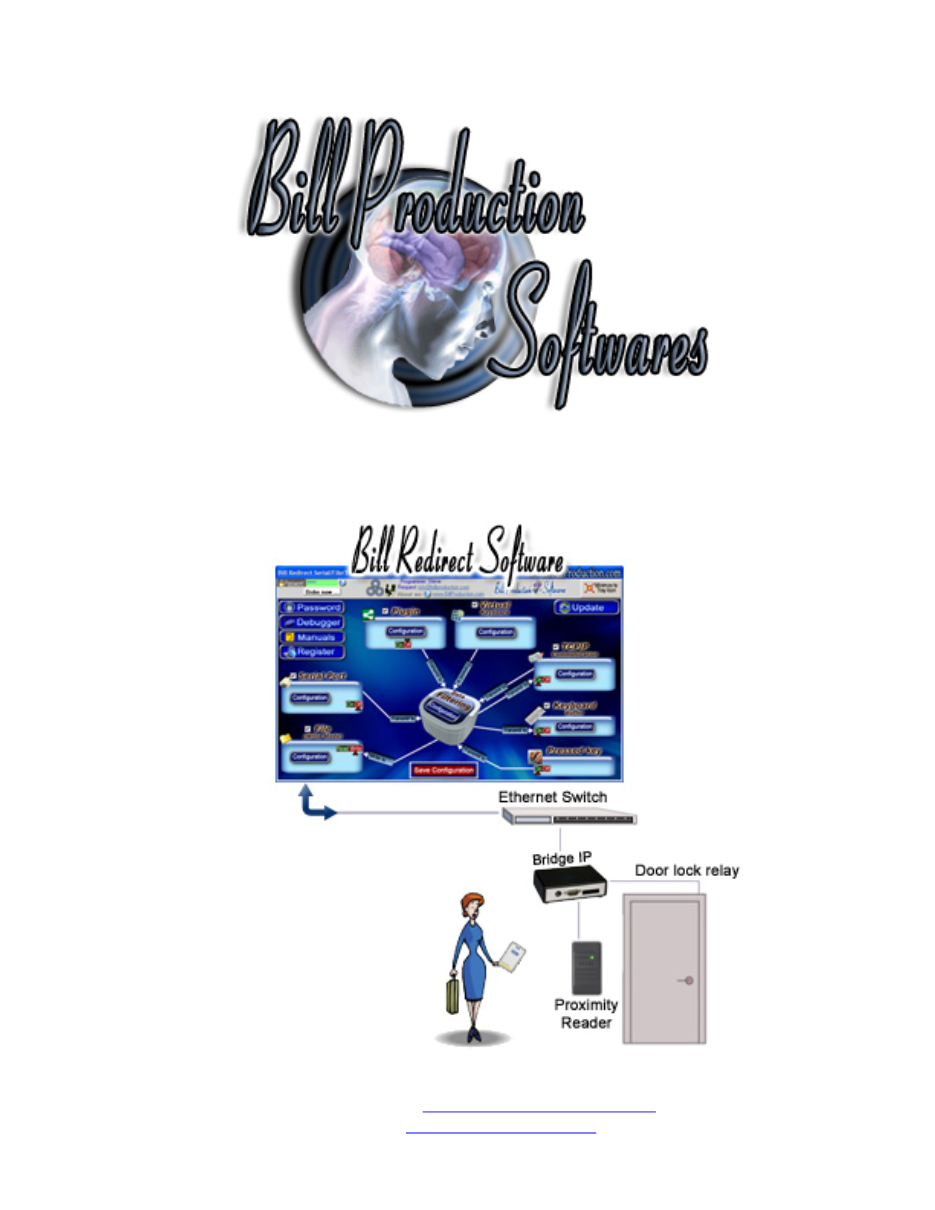
Bill Redirect Application
Door Locks access control with Symcod products Bridge IP
(Support: RFID reader, Proximity reader,
Biometric reader, Barcode reader, KeyPad … )
Use this documentation with the product : Bill Redirect Version 6.0B or more.
(Rev.: 12/04/2009)
Our Internet site:
Email:
info@BillProduction.com
1
SOFTWARE
DESCRIPTION
BillRedirect application works with all Symcod products !
This professional multi TCP port application enables
Symcod Product Bridge IP to control Door Locks Access.
Symcod Bridge IP
No additional hardware or programming required !
Supported Operating Systems:
Windows 98,Me,2000,3000,XP,NT4, Vista.
2
GENERAL INFORMATION
To configure this application you have to enter in the field password
www.billproduction.com
, In the
configuration options you have the possibility to change this password for what you want.
To close this
software, type END in the password field.
Application configuration and integration assistance
It's free, fast
(usually the same day)
, and efficient !
Submit your case to
info@billproduction.com
and receive a customized answer !
Custom Application Development
With over 15 years of experience in successfully providing Custom Application Development solutions for
over 300 customers, we have honed our processes and skills to cater to your specific business needs.
To request a feature, a Customize option or any kind of Software:
Contact by email:
info@billproduction.com
3
This example shows how you can control door lock access
via the product Bridge IP (Symcod)
with Bill Redirect software.
Step #1
(General)
Disable all except the
TCPIP
section
Set the switch TCPIP to:
Off
4
Step #2
(File Configuration)
Press on button:
Configuration
Activate the option:
Client
Enter in the field “IP address”:
Your Bridge IP address
* For example 10.1.200.11
* To configure your Bridge IP address use the
www.symcod.com
software: Board Config (See Step #4)
Enter in the field “Port”:
1024
Enter in the field “ETX”:
13
Press on button:
R
Step #3
(Users configuration)
5
Press on:
Configuration
Press on button:
ADD
In the field “
Search
” enter:
{ALL_RX}
In the field “
Replace by
” enter:
{TX_FILE[C:\DOOR_LOG_{CURDATE:DD-MM-YYYY}.TXT,{CURTIME} ORI_DATA]}RX_DATA
Users access configuration
To add a user who has access to that door
Press on button:
ADD
In the field “
Search
” enter the:
USER CARD NUMBER
* For example:
12345
* To activate the relay regardless of the card number, use this syntax:
{ALL_RX}
* To activate the relay if
the card start with
233
, use this syntax:
{START_WITH}233
In the field “
Replace by
” enter:
{TX_TCP[><T1T05]}
*The command
{TX_TCP[><T1T05]}
is to open the Bridge IP relay number 1 during 5 seconds.
Repeat this sequence to add other users.
Press on button:
Save Configuration
6
Step #4
(Symcod product Bridge IP configuration)
Via
www.symcod.com
website download and install the software:
Board Config
In Board Config application press on the line corresponding to your Bridge IP product
In the field IP:
Enter the IP address to be given to your Bridge IP.
* It must be in the same IP range as your computer.
(Contact you network administrator)
Activate the option:
Bridge
Activate the option:
400
Press on button:
Save Configuration
If you've followed the steps:
You should see the cards NUMBER appear in Bill Redirect Application section “DEBUGGER”
At this step, if Bill Redirect Application receives a valid card number
(entered in step # 3)
, it will activate
the relay for a period of 5 seconds. If you listen carefully, you can hear the change of state of the relay.
For more information about the Bridge IP
download the MANUAL via
www.symcod.com
or contact Symcod technical support team.
7
For more documentation visit:
If a problem persist …
Application configuration and integration assistance
It's free, fast, and efficient !
Submit your case to
info@billproduction.com
and receive a customized answer !
Step #5
(
To control multiple doors with Bill Redirect use this optional step
)
To control multiple doors, you must start some instance of Bill Redirect Software.
Use this syntax: Bill_Redirect_Serial_to_KB.exe /#INSTANCE_NAME#
Each instance can have a different configuration !
Example: Create a Shortcut instance
Door_001
- Create a shortcut on your desktop to start BillRedirect application
Shortcut properties:
- In the first field (Target) enter:
"C:\Program Files\BillProduction\Bill Redirect Serial COM Port to Keyboard Buffer\Bill_Redirect_Serial_to_KB.exe" /#Door_001#
- Start our application with this shortcut
Example: Create a Shortcut instance
Door_002
- Create a shortcut on your desktop to start BillRedirect application
Shortcut properties:
- In the first field (Target) enter:
"C:\Program Files\BillProduction\Bill Redirect Serial COM Port to Keyboard Buffer\Bill_Redirect_Serial_to_KB.exe" /#Door_002#
- Start our application with this shortcut
To duplicate the users cards numbers configuration from Door_001 to Door_002
use this command directly at Dos or via a batch file:
Copy C:\BillProduction.CFG_Door_001\TOUCHE*.* C:\BillProduction.CFG_Door_002 /Y
8
PERSONALIZE
You can personalize our application with your company name, logo, skins, password, directory.
..
With this
possibility you can distribute our application with your company information !
The end user, will think that
you are the creator of this application !
- To Extract the current configuration setting, just type in the field password:
SAVE_SKIN
- After this action, a message box appear to indicate where is the configuration.
- Now you can modify this configuration files for what you want (Skin*.*).
- To re-load your skin modification type in the password field:
LOAD_SKIN
*At startup our application load automatically your configuration
*To open the mouse position monitor, type MOUSE in the field password and move the main window in the left top corner.
How change the default configuration directory:
*By default the configuration of our application is in the directory: C:\BillProduction.CFG\
To change this directory:
- In the same directory that our .exe application or in your C:\ modify the file:
BPCFGDIR.TXT
* This file contain the default configuration directory.
* Several BillRedirect softwares in differents computers, can use the same directory over the network. If the
configuration changed in a computer, then other computers automatically synchronize in the next 5
seconds.
All the configuration is by default in C:\BillProduction.cfg\*.* then to duplicate the configuration from a computer to another,
just copy this directory.
* Don’t forget to close Bill Redirect on target computer before copy the configuration.
For more flexibility/options or an installation package build for your company:
info@BillProduction.com
*Also available on request, all our advertising (PDF format) are available in source mode (Document Word),
send your request by e-mail to:
info@BillProduction.com